前几日订阅了少数派收费栏目 Power+ 2.0 ,为 Fairyex 写的几篇Tasker教程所吸引,跟着《利用 NFC 实现自动记录时间 》这篇文章的步骤,付费了 Tasker,也买了 NFC 标签……也有所思考。
Fairyex 在「根据不同 NFC 标签内容触发不同任务」一节中,面对从 NFC 标签中读到的不同数据,使用了 IF... ELSE IF... 的方式进行分支。而我想到了另外一种实现方式。使用多行文本来存储类似表格一样的内容,通过正则表达式和 Tasker 的搜索匹配功能对内容进行提取和分组。
首先先大致描述下 Fairyex 前辈的实现逻辑:
1. 读入 NFC 标签内容
2. IF NFC 标签内容 为 A
	3. 设任务名称为 A不拉不拉
	4. 执行 Toggl 计时任务
5. Else IF NFC 标签内容 为 B
	6. 设任务名称为 B不拉不拉
	7. 执行 Toggl 计时任务
8. 结束 IF
如果任务很多,最后的成品代码将会非常难以阅读。并且日后需要修改任务名称的时候,要在大量的 IF... ELSE... 中寻找待修改的内容,个人感觉可修改性很差。于是想到了利用多行文本和正则进行匹配的实现方式。大致描述如下:
1. 读入 NFC 标签内容
2. 设定当作数据库的多行文本变量 LIST
3. 提取 NFC 标签内容所在的整行内容到变量 LINE 中
4. 将 LINE 以指定的字符分割为一组变量数组
5. 设任务名称为 变量数组中代表名称的那个
6. 执行 Toggl 计时任务
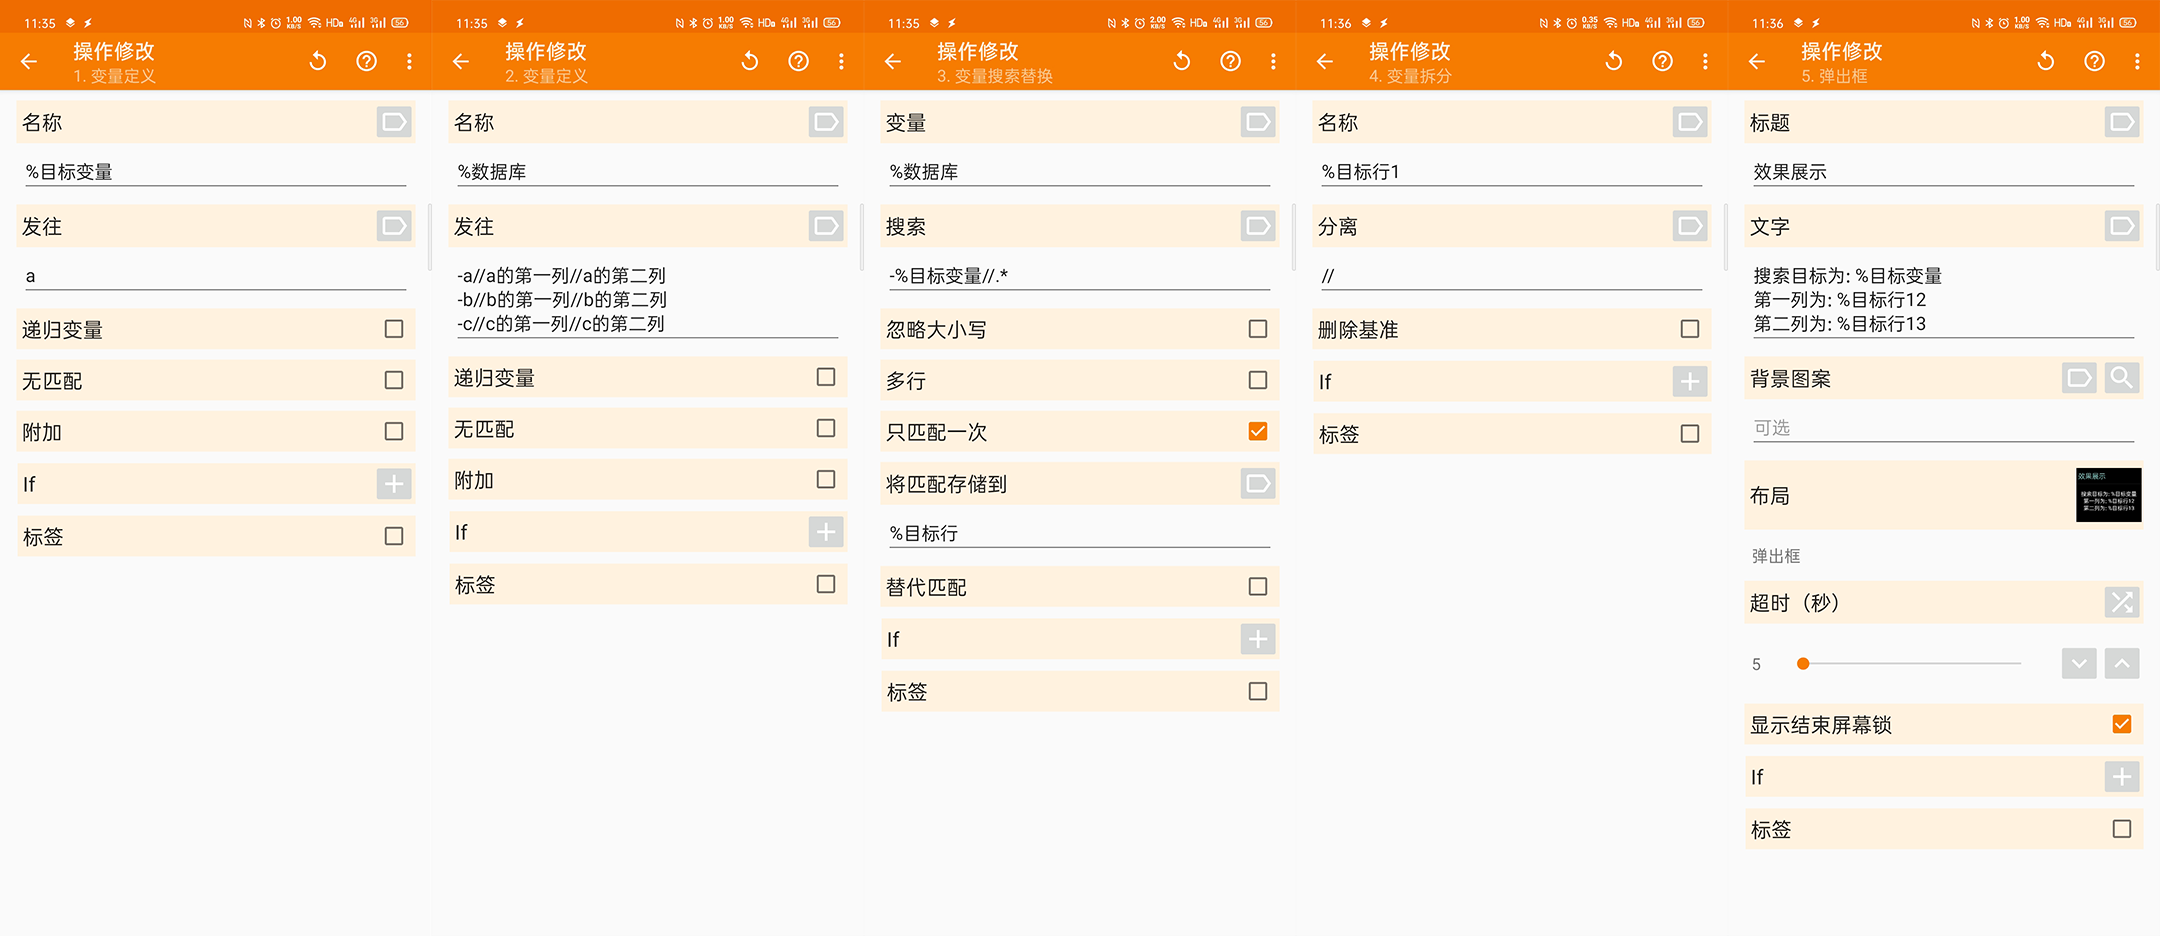
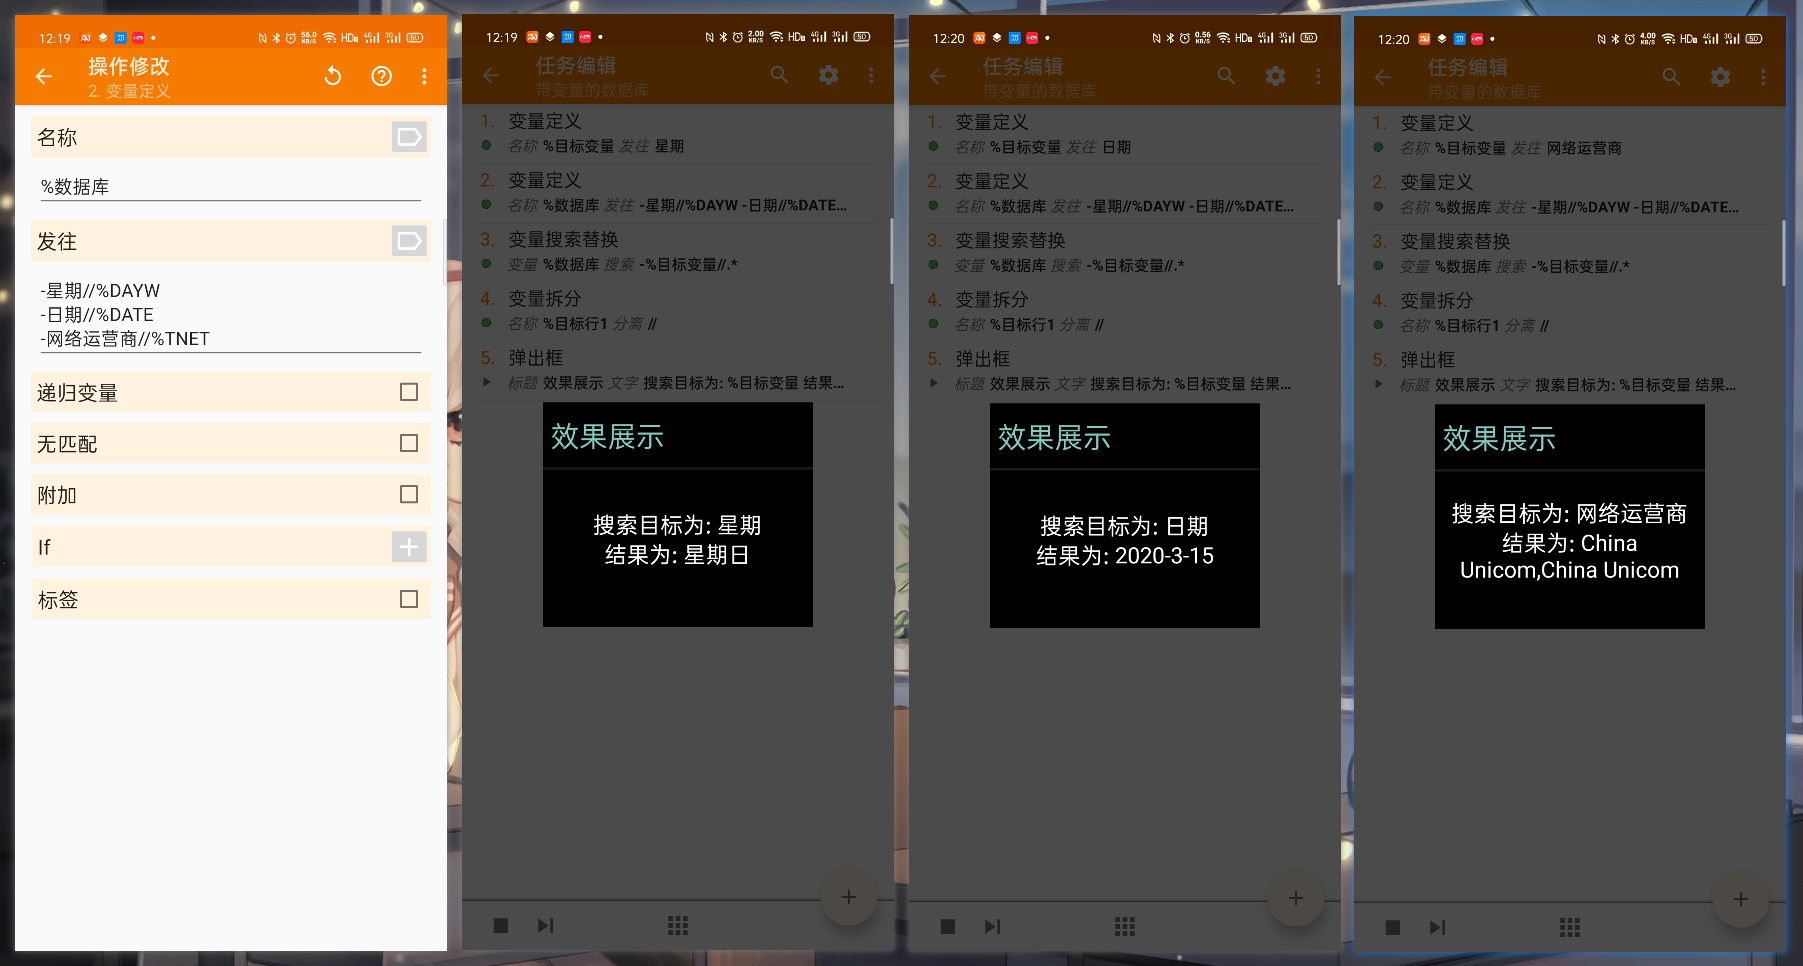
这样的描述可能过于抽象,因此我做了一个演示任务来帮助大家更好的理解这一思路:
左图为演示任务的内容,中图和右图分别为将 %目标变量 设为 a,b 后,在变量 %数据库 中匹配出来的结果。如果日后需要修改任务的名称等信息,只需要修改 2.变量定义 中定义的变量 $数据库 的内容即可。
1. 变量定义 定义了要查找的 %目标变量 为 a。
2. 变量定义 定义了以特定格式存储类似表格一样的多行文本的变量 %数据库。
这里的「特定格式」,以-开头,中间各列以//或者其他不会在内容中出现的符号做分割。演示任务中的定义是这样的:
-a//a的第一列//a的第二列
-b//b的第一列//b的第二列
-c//c的第一列//c的第二列
3. 变量搜索替换 ,通过正则表达式 -%目标变量//.* ,将「每行开头 - 与第一个 // 之间内容」和「 %目标变量 」一致的整行内容匹配出来,并且存储到变量 %目标行 中。需要注意的是,之后再次引用时,要在变量名称为 %目标行1,这是因为Tasker 的搜索匹配结果是以数组的形式保存的,而第一次匹配的结果存储在1号下标的位置。
因为 %目标变量 为 a, 所以此时 %目标行1 的内容为 -a//a的第一列//a的第二列。
4. 变量拆分, 以 // 为分隔符,将 %目标行1 中内容分割为 -a,a的第一列,a的第二列。并分别储存到变量 %目标行11,目标行12,目标行13 当中。
这样的操作就可以替代大量的 IF... ELSE 来进行判断了。
完整的截图如下:
PS:在用作存储对应关系的 %数据库 中,不止可以存储纯文本信息,也可以插入带有变量的内容。比如这样的一个例子: